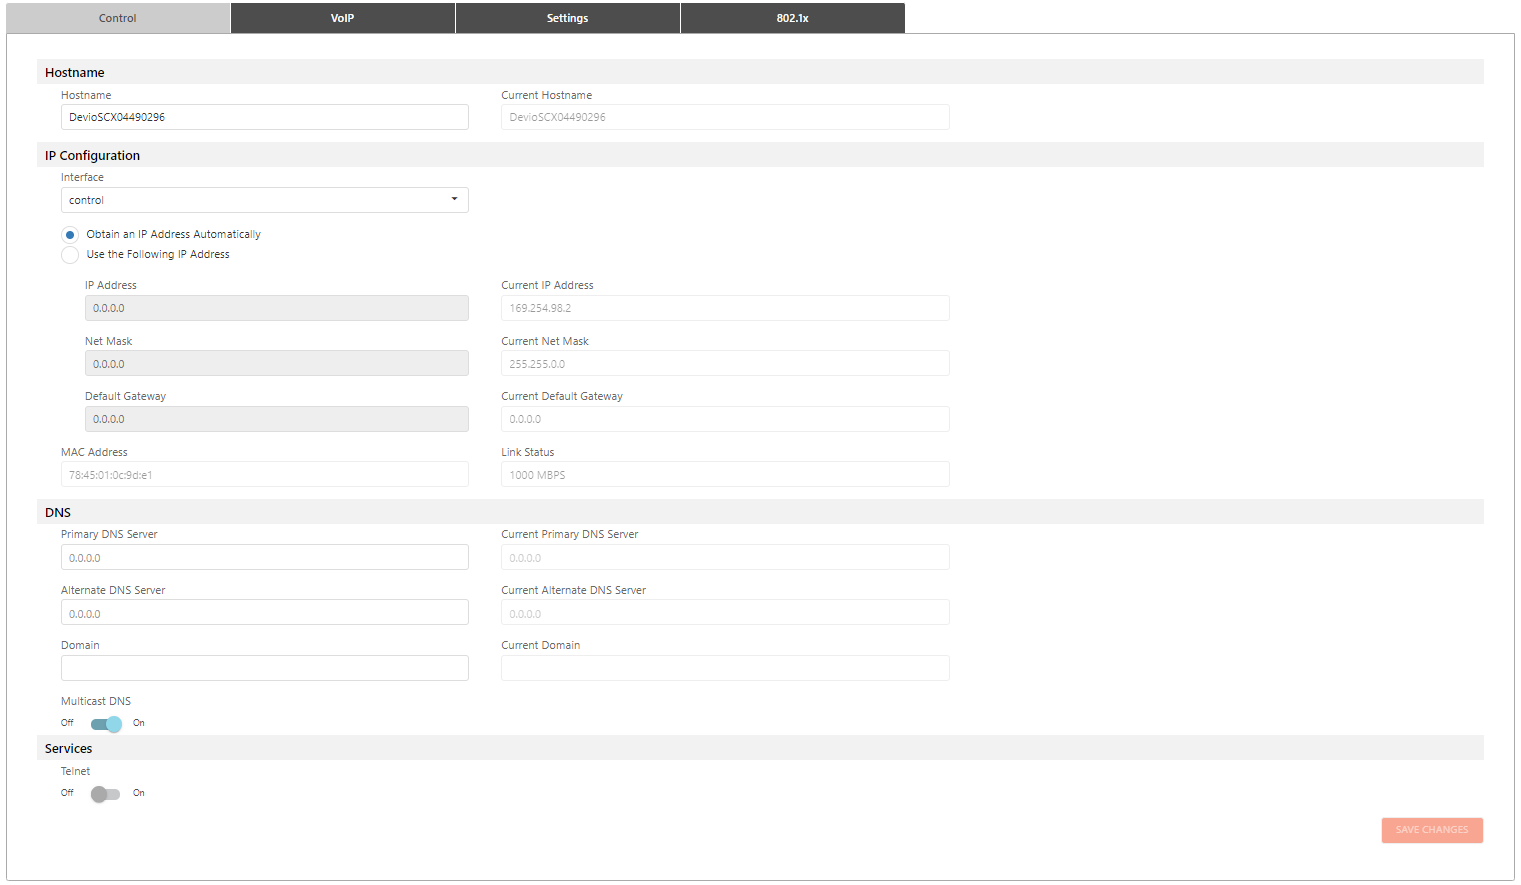
The Network page allows authorized users to configure the behavior of external devices to carry out the defined requirements of a network.
Click the links below to jump to a different topic:

The IP address given to host is assigned to its network interface. Users may select the network interface from the drop down to access that IP address:

Allows the user to configure the network device to assign a dynamic IP Address to itself or enter an IP Address manually:
Identifies the network's available hosts within the local subnet.
The device address managing traffic externally to the local subnet.
The DNS section allows a user to manually enter a Primary and/or a Alternate DNS server address. The Domain corresponds with the DNS to access the user interface.
Enable Multicast DNS to transmit data to multiple destination computers simultaneously:
Enable Telnet to allow users to manage a device remotely.
Enable SSH to allow two or more computers to communicate and share data.
The user can make network changes to VoIP in a configured system:
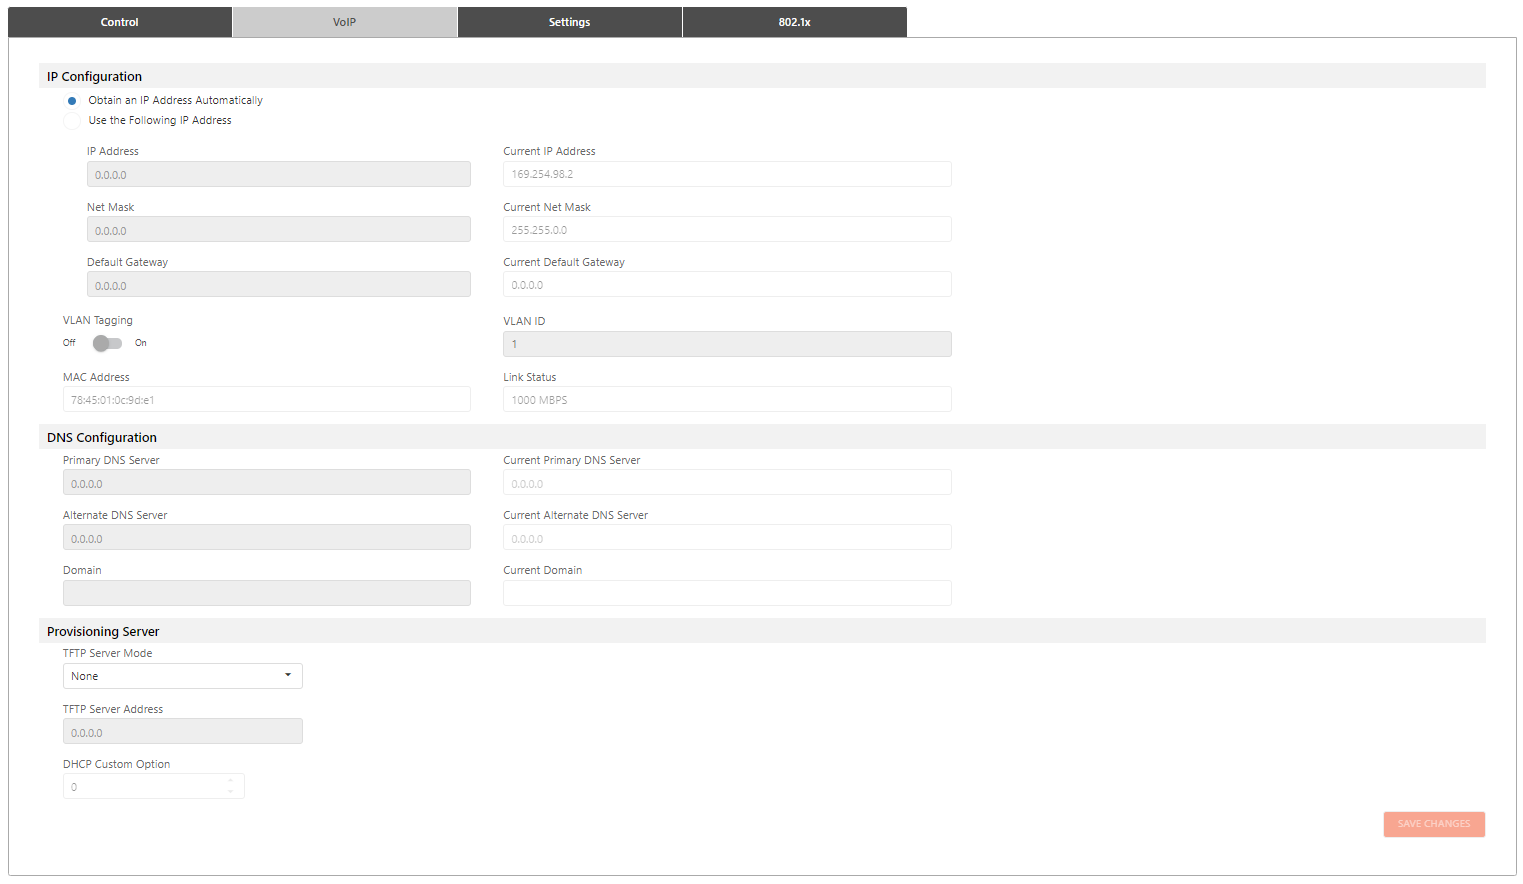
Allows the user to configure the network device to assign a dynamic IP Address to itself or enter an IP Address manually:

NOTE: VoIP services will go down for a few seconds while the changes are being applied and the VoIP services are restarted.
Identifies the network's available hosts within the local subnet.
The device address managing traffic externally to the local subnet.
A packet tagged with a VLAN tag makes it easier to identify which packet belongs to which VLAN after crossing one or more switches:

The DNS section allows a user to manually enter a Primary and/or a Alternate DNS server address. The Domain corresponds with the DNS to access the user interface:
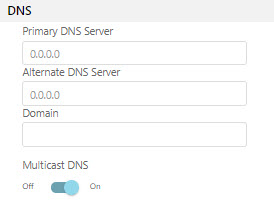
NOTE: VoIP services will go down for a few seconds while the changes are being applied and the VoIP services are restarted.
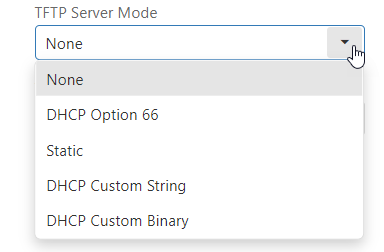
The Provisioning Server allows the user to upload a config file (JSON) the from the Trivial File Transfer Protocol (TFTP):
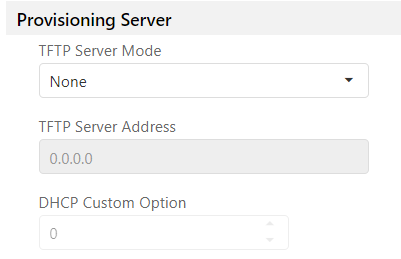
The TFTP Server Mode allows the setup of one of the following:
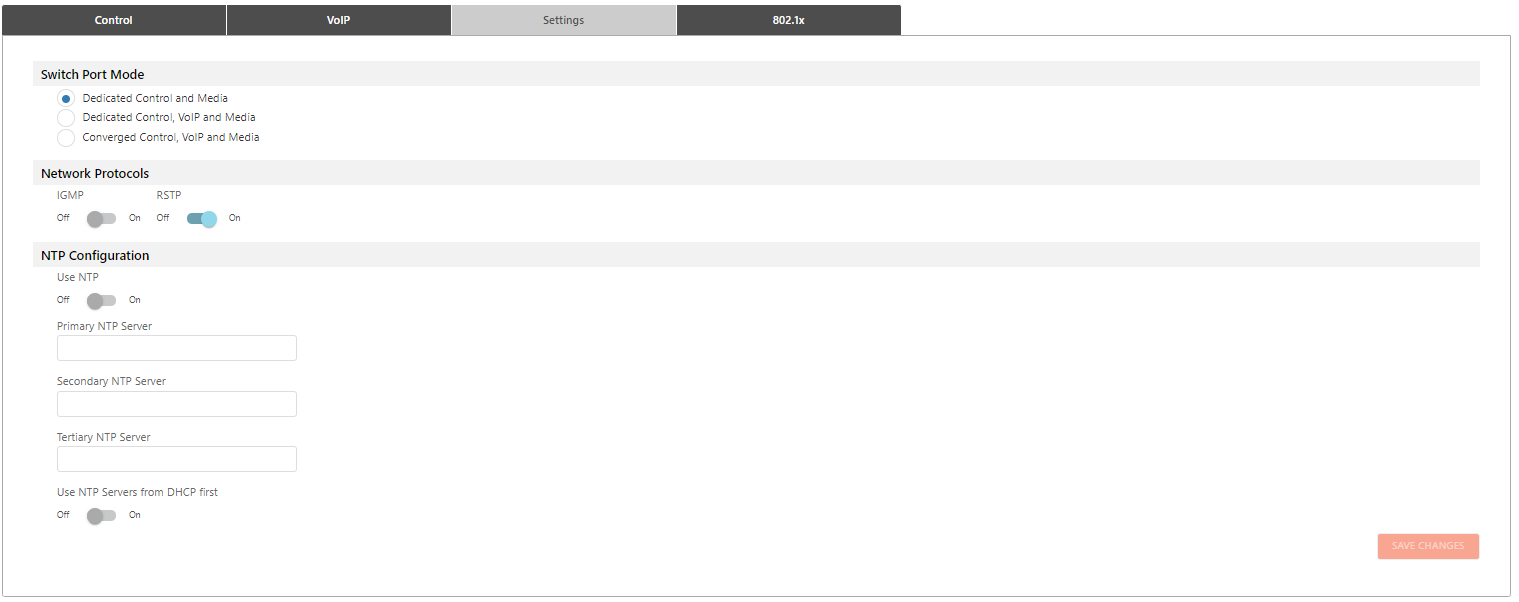
Allows selecting port modes as follows:
Dedicated Control and Media Port (P1 Control/VoIP; P2-5 Media)
Dedicated Control, VoIP and Media Port (P1 Control; P2 VoIP; P3-5 Media)
Converged Control, VoIP and Media (P1-5 support all media)
Internet Group Management Protocol (IGMP) is part of IP multicast and authorizes the network to direct multicast communications only to hosts that have requested them.
Rapid Spanning Transport Protocol (RSTP) may be toggled on or off as well:
RSTP enables faster convergence times than STP and adds two additional port types – alternate and backup.
The Network Time Protocol (NTP) is used to synchronization computer clock times in a network:
Users may define up to three NTP servers.
If the network provides a DHCP server, it can also be chosen as the NPT server. The default NTP server is time.biamp.com.

Tesira supports 802.1x, which is an IEEE standard for port-based Network Access Control (PNAC) and is part of the IEEE 802.1 group of networking protocols. 802.1x authentication requires that a device present certification in the form of a password or certification depending on the mode set during configuration.
Users must the 802.1x protocol mode by which authentication takes place. The modes available from the drop down are as follows:
| Mode | Description |
|---|---|
| Disabled | Default setting |
| MD5 | Challenge-based password |
| TLS | Certificate-based two-way authentication |
| PEAP_MSCHAPv2 | Server authentication via certificate; client authentication via another EAP method |
| FAST | Certificate-based two-way authentication |
| TTLS_MSCHAPv2 | Optional server authentication via certificate; client authentication via another EAP method |
Optional filed. Only enabled when "FAST" or "TLLS MSCHAPv2" is set as Mode.
Disabled if Mode is disabled. Credentials are required for all other Mode settings.
Disabled if Mode is disabled or set to TLS.
Gives the user the option to upload their own root certificate. Uploading a root certificate option is disabled if Mode is set to one of the following:
Click the 'Select Certificate" button to upload a certificate from a file browser. The following information will be shown next to the Root Certificate Info text when a valid certificate is imported:
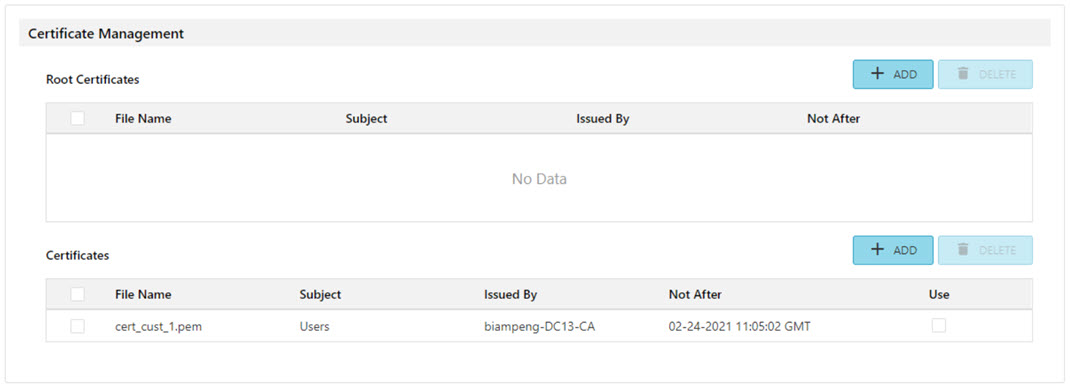

NOTE: Root Certificate formats must be either .pem or .der. and is limited to a size of 10K (10240 bytes).
Click the "Select Certificate" button to select a certificate from a file browser. The following information will be shown next to the Client Certificate Info text when valid certificate is imported:


NOTE: Only required in TLS mode
For authentication methods that required this certificate, the identity (Username) must match the text next to "Issued to" in the fields to the right of the Client Certificate preceded by the domain name. "biamp" being the domain, and "admin" being the username. Note that the domain and username are provided as examples only; in order for a device to authentic on the server, a valid username must be entered that exists on the authentication server.
NOTE: Client Certificate format must be .pem and is limited to a size of 10K (10240 bytes).
There are potential issues to consider if a certificate fails to upload or validate:
The file is empty
The certificate file has exceeded the maximum size limit of 10K (10240 bytes)
The uploaded Root certificate has failed validation; make sure the file has a certificate section and no private key
The uploaded Client certificate as failed validation; make sure the file has a certificate section and does have a private key
The certificate is expired or not yet valid